Best Pie Crust Tips
Nov 10, 2021
This post may contain affiliate links. Please read our disclosure policy.
My best pie crust tips will get you to fabulous for your pie crusts, every time. My favorite pie crust recipes, which happen to be vegan, result in flakey, golden crusts ready for every filling you can imagine.
Oil-based Crust
My two favorite crusts are both oil-based but both different. Every year I laud the wonder that is My Mom’s Best Pie Crust. This is a liquid- oil-based crust, using vegetable, canola, or other neutral oil. Also try my coconut oil-based crust, which takes a totally different approach. Because coconut oil solidifies at room temperature, it performs like Crisco (owie, but still a favorite for many bakers) or butter in the mixing and handling.
The little hit of salt in these crusts is good with every filling the crusts have ever met!
The Roll Out
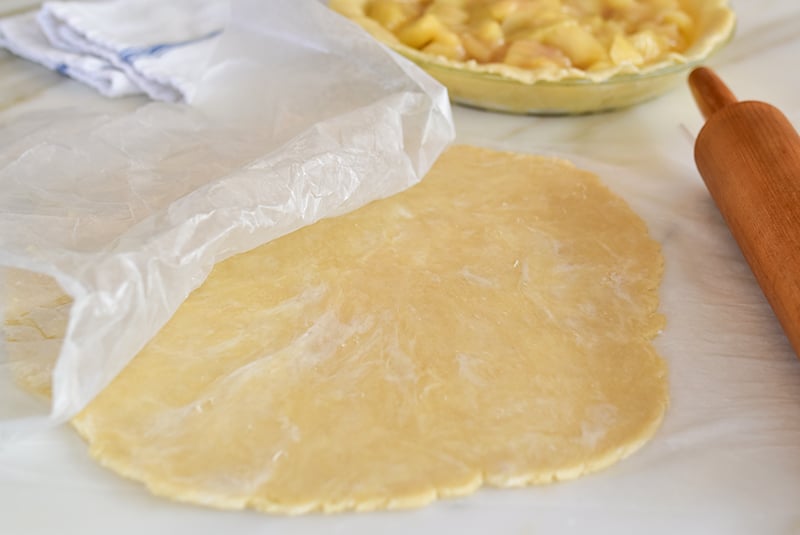
To roll the liquid oil crust, use two sheets of wax paper. The bottom sheet is held to the counter with a sprinkling of water. This can be finicky, because too much water makes the paper soggy and prone to move too much under the pin. Not enough water, and the paper won’t hold. I err on the side of less water and will lift and add more if needed, a sprinkle at a time with a wrung out sponge.
My latest don’t-miss-it tip for this crust: a sticky pie crust mat like this one from Sur La Table. My brother Richard gave me one of these and the game has been changed big-time and forever!
I prefer Mom’s oil crust over butter crust for pie, but I do get butter in there with my tart crusts.
Liquid Oil-Based:
Coconut Oil Crust:

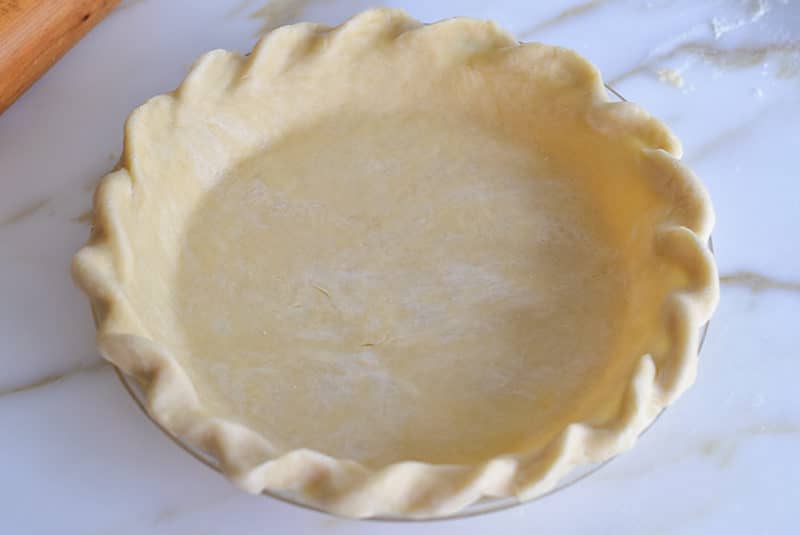
The Crimping.
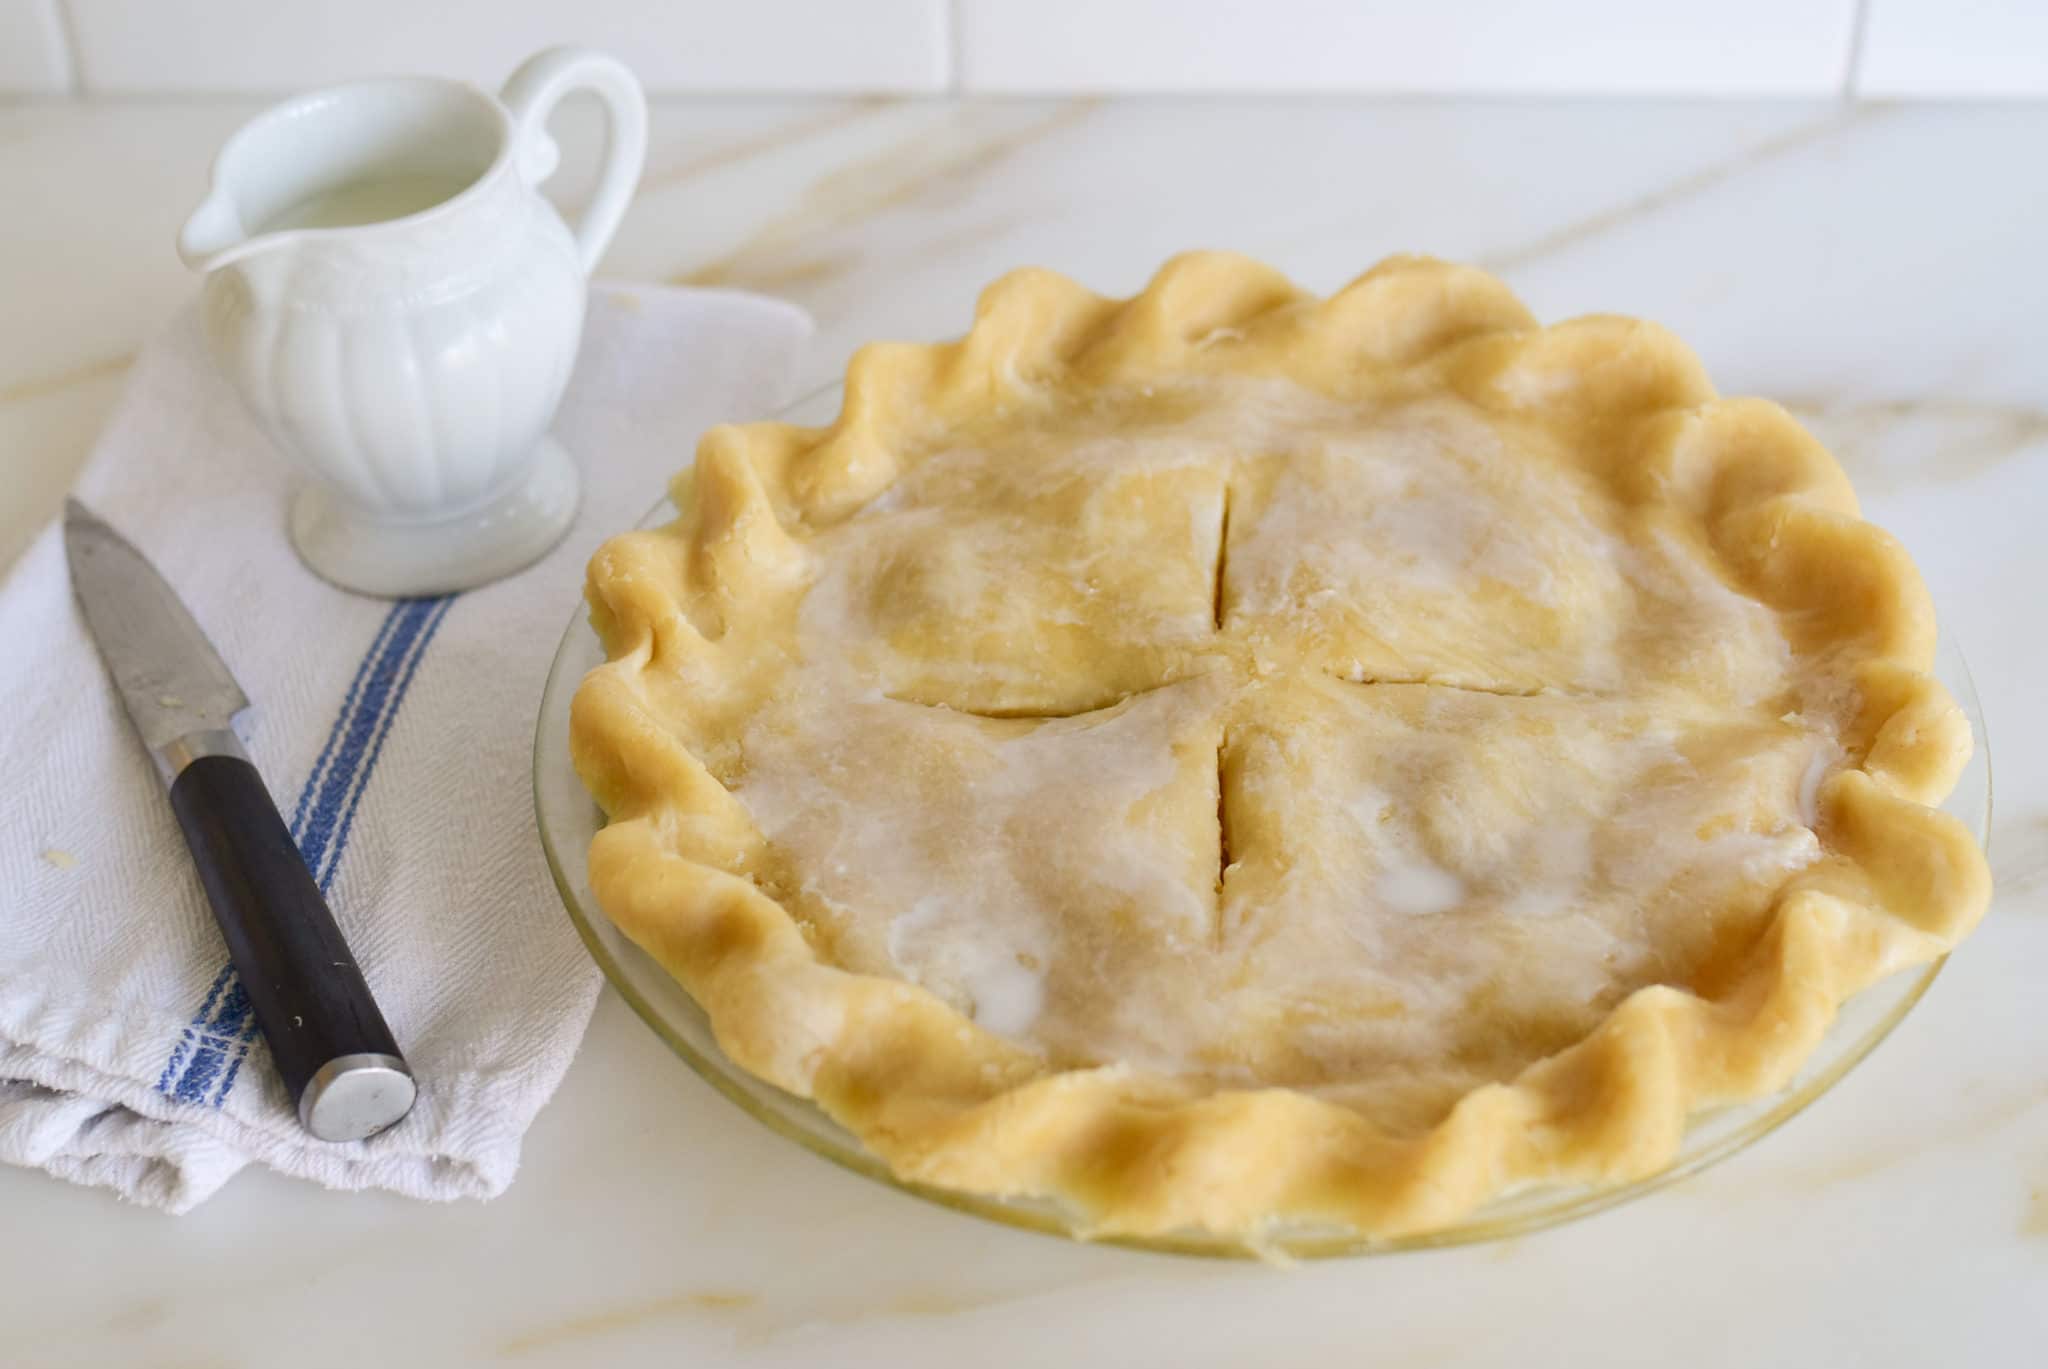
The edge of the crust loves a little platform on the plate to rest on, which is why I prefer these flat-rim Pyrex glass for my pies. To get enough dough around the perimeter to crimp, roll the crust a little larger than needed, then tuck the excess under. Push that into a tidy rim that doesn’t have cracks or unevenness. Steal from Peter to pay Paul here if needed, taking excess dough from one area and plumping up from underneath in another thinner spot. Then smooth any fissures with your fingers.
For double crust pies with a crust both under and over the pie, roll the top layer about one inch larger than the plate rim, then tuck that under the lower crust around the perimeter and proceed as above, tidying up and evening out.
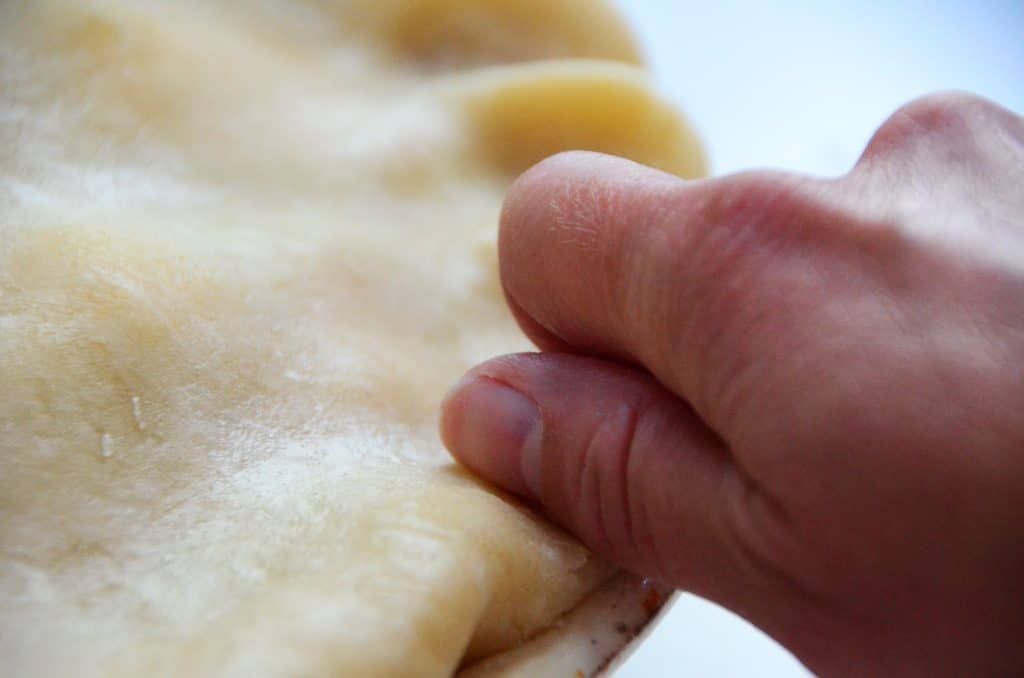
The rope crimp is my all-time favorite, learned from Mom of course, and I can’t quit the pleasure it is to make and look at. Most every pie I make has the rope crimp. It’s a hallmark, a mom-mark. The rope crimp is done by squeezing the dough on an angle between the thumb and middle knuckle of the first finger. A video helps and you’ll see mine on my Pie folder, InstagramTV and soon in reels.
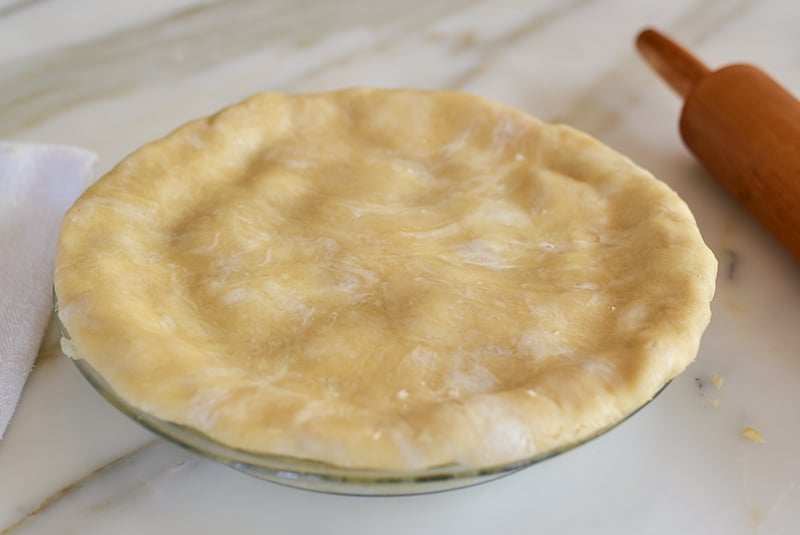

Top Crust Beauty
The top of the crust is the beauty shot and the pride of the dessert table.
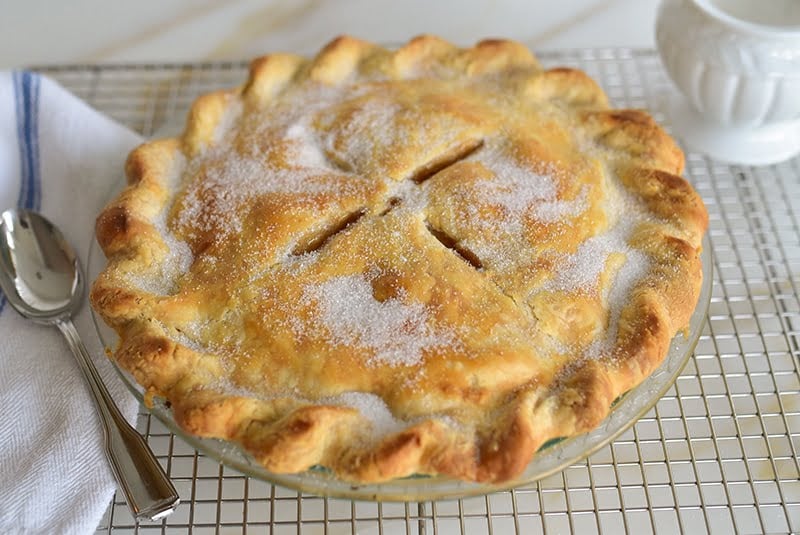
Be sure to cut “vents” in the top to allow steam to release as the filling bakes. Do this however decoratively you like. My vents are like a cross in the center of the pie. When checking for doneness, look at the vent cuts and when filling is bubbling and does so for several minutes, that’s a sign the filling is cooked.
For a shiny, golden top, dab and rub or brush milk over the surface of the top of the pie. I typically avoid the edges because they brown so readily and swiftly on their own. Use milk of any fat level, including cream or half and half. For a vegan approach, use almond milk, liquified coconut oil, or no wash at all.
My mom’s special touch was a dusting of granulated sugar over top of a baked double crust pie. I do same right when the pie is out of the oven and still warm. We love that crystal, glistening beauty.
Make Ahead and Freezing Tips
Both of these crusts prep in advance like a dream. You just need enough pie plates to leave a few in the freezer until go time.
Frozen crust works well for single-crust pies (meaning, no top crust is needed, as in cream pies and streusel topped pies). When the crust is rolled and crimped in its plate, place that in the freezer until frozen solid. This protects the crimped edge from getting banged up when wrapped and potentially stacked with other pie crust plates.
Once frozen, lay a piece of wax paper over the top, then wrap the whole thing, frozen dish and crust in it, with plastic wrap.
A whole pie with double crust (one under, pie filled, one over top then edges tucked and crimped) can be assembled and frozen, then wrapped as noted above.
Baking from Frozen
To use a frozen single crust, simply bake from frozen for refrigerated or cream fillings that don’t require baking in the crust. Use a pie crust protector (I have several and can’t bake pie without it!) or crimped foil around the edge of the crust, especially because the crust will need to bake a touch longer than from room-temperature dough. Be sure to prick the base of the single crust with a fork, or use pie weights or dry beans to hold down the crust while it bakes at 350 degrees F.
To bake a frozen whole pie, bake from frozen per the heating instructions for that pie, typically starting at 425 degrees F and reducing after 15 minutes to 375 degrees F. For frozen, each of those baking times will increase and a crust edge protector should be used so the edge doesn’t burn while the filling bakes to bubbling. A piece of foil may need to be set lightly over top of the whole crust to prevent over-browning while baking.
Another baking tip, from frozen or fresh: I always lay a piece of foil over the base of the oven to catch drips. Fruit pies should bubble and potentially drip, indicating the filling has cooked through. That drip burns on the base of the oven, so now your kitchen is scented with burn rather than beautiful pie! Fold up the edges of the foil to create a rimmed pan effect, to prevent the juices from running off. I don’t use a sheet pan because it can inhibit heat distribution throughout the oven.
Want pie and tart recipes? Check them out here!


I have been a pie-crust snob for years, always using butter. Now at 77, I wanted something easier and fool proof. I tried your Mom’s oil crust well before T-day to be sure it would be worthy of praise. I was shocked at the simplicity and ease of making this crust. I made a custard pie, baking the crust for 8 minutes before filling so as not to have a soggy crust. It was marvelous! Can’t believe I battled crust the hard way for years. I am excited now to make my pies the morning of the holiday instead of the night before. It takes so much less time to roll out and fill. I will still make the dough two days in advance and keep in the fridge. Kudos to you and your Mom. I am sold.
Martha this makes me so happy, SO happy! Thank you! Just the best, flakiest crust around.